


Your shopping cart is empty!
0


Batteries | 6 MIN READ

MARK WATSON | CONTENT HEAD
07
Oct, 2024Initiating your caravan at a site may seem perplexing initially. Quite a few individuals consider the procedure challenging. You just need to follow a plan in place and know what you are doing. Below, you'll find the best guide to set up a caravan on a camp site with three main stages. The first one is preparation.
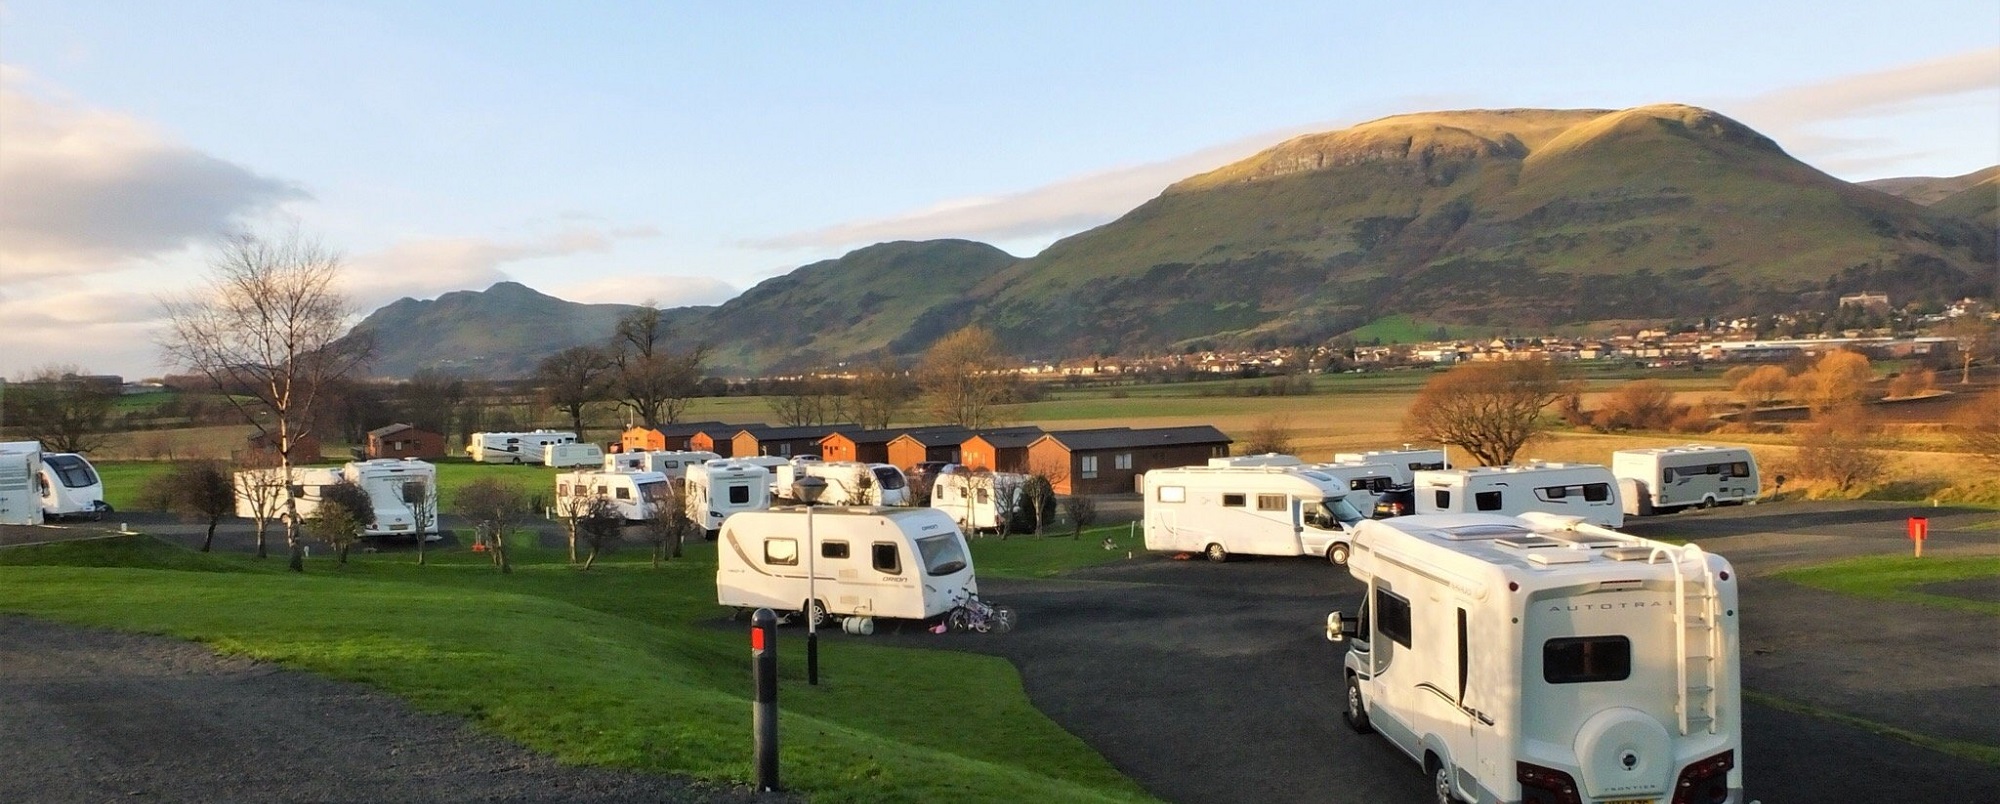
1. Preparing to Set Up Your Caravan
Preparing your caravan for a stay involves more than just arriving at your campsite. It starts with careful planning and knowing the steps for a smooth setup. Additionally, check the water supply containers, pumps, and filters to ensure that the caravan's water system is ready.
Choosing the Right Pitch
Selecting the ideal pitch is a crucial first step. Look for level ground to ensure your caravan stays stable. It would be best if you also considered the sun's and wind's direction. A spot with some shade can be refreshing in summer, but too much tree coverage might block sunlight during cooler months.
Check for nearby water points and waste disposal areas; being close to these facilities can save time and effort.
The perfect pitch combines convenience with comfort.
Avoid placing your caravan near high-traffic areas like walkways or bathrooms, as these spots get noisy, especially at night. Reversing onto your pitch gives you more control over positioning, ensuring you adhere to campsite rules about boundaries and privacy.
Leveling ramps are handy on uneven surfaces, so always have them ready.
Hitching Up Your Caravan
Hitching up your caravan is a crucial step in preparing for a safe and enjoyable journey. Before you begin, ensure you clearly understand the process and have all the necessary equipment. Here’s a step-by-step guide to help you hitch up your caravan with ease:
- Prepare the caravan: Ensure the caravan is in a stable position, with the handbrake engaged and the wheels chocked. This prevents any unwanted movement while you work.
- Attach the breakaway cable: Connect the breakaway cable to the tow vehicle’s tow ball, making sure it’s securely attached. This safety feature is essential in case the caravan becomes detached while towing.
- Raise the hitch: Use the jockey wheel to raise the hitch until it’s above the tow ball. This allows for easy alignment when reversing the tow vehicle.
- Reverse the tow vehicle: Carefully reverse the tow vehicle until the tow ball is aligned with the hitch. Use your mirrors and, if possible, have someone guide you from outside.
- Lower the hitch: Slowly lower the hitch onto the tow ball, ensuring it’s securely attached. You should hear a click or see an indicator showing it’s locked in place.
- Connect the electrics: Connect the caravan’s electrical system to the tow vehicle’s electrical system. This ensures that all lights and indicators on the caravan function correctly.
- Check the lights: Test the caravan’s lights to ensure they’re working properly. This includes brake lights, indicators, and tail lights.
- Final checks: Perform a final check to ensure everything is secure and in working order. Double-check the hitch, breakaway cable, and electrical connections.
By following these steps, you can hitch up your caravan safely and confidently, ready for your next adventure.
Positioning the Caravan Accurately
Positioning your caravan accurately is crucial for a successful setup. Using a motor mover can greatly simplify the process of positioning your caravan accurately, especially in tight spaces. Begin by reversing onto the pitch carefully, aligning the caravan within the defined pitch boundaries.
Use your mirrors to guide you, and if possible, ask someone to spot you from outside. This ensures you don’t cross into another camper’s space. Once in position, apply the handbrake firmly to secure the vehicle before releasing the stabiliser.
It’s important that your caravan sits well within its allotted space not just for courtesy, but also to comply with campsite rules.
Next up, levelling the caravan becomes our focus of attention.
2. Caravan Set Up Checklist
Understanding the critical procedures for preparing your caravan ensures a seamless commencement to your camping journey. It converts an intimidating task into an engaging part of the excursion. Setting up a caravan involves several critical steps to ensure a smooth and enjoyable camping experience.
Levelling the Caravan: Jockey Wheel
Setting up your caravan at an optimal level is integral for a pleasant stay. Ensure the caravan wheels are chocked to prevent any movement during the leveling process. A correctly balanced caravan guarantees that all built-in gear operates effectively. Here are the steps you can follow:
- Initially, position your caravan on the planned pitch.
- Determine the preliminary level by utilising a spirit level on your caravan’s flooring.
- If the caravan appears to be off balance, discern which side is sagging.
- Extract the levelling ramps and arrange them adjacent to the tyres of the sagging side.
- Gradually manoeuvre your caravan onto these ramps until it attains a better equilibrium.
- Again use the spirit level to verify if a more satisfying levelling has been achieved; go back to steps 4 and 5 if needed.
- Once levelled, engage the handbrake tightly to guarantee your caravan’s stability.
- Loosen the stabiliser legs by turning them downward until they securely connect with the ground, ensuring they don’t elevate the caravan in the process.
- Cross verify with your spirit level; minor modifications might still be requisite.
- Lastly, corroborate that all doors and built-in gear perform cohesively in this rejuvenated position.
Attaining an ideal balance for your caravan would elevate comfort levels and also circumvent complications with refrigerator functioning and doorway alignment, thereby enriching your camping escapade.
Connecting Utilities
Connecting utilities in your caravan is a key step for comfort and convenience at the campsite. Proper connections ensure your caravan functions just like home, only with the added bonus of different scenic views through the window. Here's how to get it done:
- Start with electricity. Locate the electrical hook-up point on your pitch. This usually comes as a blue, three-pin plug that connects to your caravan's electric input socket.
- Unroll your cable fully to avoid overheating and plug it into the caravan first, then connect it to the campsite's electrical point.
- Make sure you use an RCD (residual-current device) for extra safety against electric shock.
- Next, sort out water connection. Find the water tap nearest to your pitch if direct hookup is not available.
- Use a food-grade hose to fill up your onboard water container. Avoid any kinks in the hose so water flows freely.
- For continuous supply, consider buying an adaptor that connects directly from the tap to your caravan’s water system.
- Waste water needs attention too. Place a waste container under your caravan's waste outlet.
- Ensure it's securely connected to prevent leaks and odours escaping.
- Lastly, deal with gas for cooking and heating by connecting your gas bottle via the regulator provided in your caravan storage compartment.
- Always check connections are tight and leak-free by applying soapy water around joints and looking for bubbles when the gas is turned on.
Each step ensures you have all the comforts of home while enjoying life on the road in scenic locations across the country or continent, making every trip memorable for all right reasons.
Setting Up the Awning
Setting up the awning can transform your caravan site into a comfortable living area. Follow these steps to ensure your awning is secure and ready for use.
- Unpack the awning from its storage bag. Lay it out flat to identify the top and sides.
- Slide the awning's leading edge into the caravan's awning rail. Start from one end and push gently until it's fully inserted.
- Assemble the frame outside of the caravan. Connect all poles as marked by the manufacturer.
- Lift the frame into position at the front of the awning. Make sure each pole is in its correct place before securing.
- Attach the awning fabric to the frame. Clip or tie it on, depending on your model's design.
- Adjust each pole to make sure they are upright and tensioned correctly. This step is crucial for stability.
- Peg down the base of the awning using ground pegs provided with your kit, starting from one corner and moving diagonally across to ensure even tension.
- Use guy ropes for extra stability against wind by attaching them at designated points on your awning and pegging them into the ground, spreading as wide as possible.
- Check all connections once more to ensure everything is tight and secure, especially if expecting bad weather.
- Finally, add any side panels or additional features like curtains or zip-on rooms according to their instructions.
Following these steps will help you create a sturdy, functional outdoor space next to your caravan, enhancing your camping experience significantly.
3. Post Set Up Safety Checks and Adjustments
Ensuring your caravan’s safety is key to a worry-free holiday. Always check gas and electrical connections before relaxing into your site, and don’t forget to secure the caravan properly against unexpected movements. Always ensure the caravan's handbrake is engaged to prevent any accidental movement.
Checking Gas and Electrical Connections
Ensuring your caravan's gas and electrical connections are secure is crucial for a safe camping experience. Faulty connections can lead to dangerous situations, including fires or gas leaks. Here's how you can check these important systems in your caravan:
- Start with the gas system by turning off all appliances and ensuring the main gas valve is closed.
- Connect the gas cylinder following the manufacturer’s guidelines closely.
- Apply soapy water to the connections and hose joins. Look for bubbles which indicate a leak.
- If you find a leak, disconnect immediately and do not attempt to fix it yourself; contact a professional.
- For electrical checks, ensure your caravan is disconnected from any external power source first.
- Inspect cords for damage or fraying and replace if necessary before connecting to power.
- Use a circuit tester on all outlets inside the caravan to confirm they are working correctly.
- Check that your caravan’s RCD (residual-current device) trips when tested, indicating it’s operational.
- Always double-check that the hookups correspond to the campsite’s power supply voltage and amperage requirements.
Regular maintenance of these systems by qualified professionals further ensures everything operates safely during your travels.
Securing the Caravan: How to Hitch Up a Caravan
Securing your caravan properly on-site is crucial for your safety and comfort. Ensure the caravan handbrake is firmly applied to prevent any unexpected movement. Follow these steps to ensure it stays in place, regardless of weather conditions or the terrain.
- Apply the handbrake firmly once you have positioned the caravan on the pitch. This prevents the caravan from moving unexpectedly.
- Use stabiliser legs to steady the caravan. Lower them until they touch the ground firmly, but avoid lifting the wheels off the ground.
- Check that all four stabiliser legs are equally tensioned to avoid a wobbly caravan.
- Place wheel chocks on either side of the tyres if you’re parked on a slope. This adds another layer of security against rolling.
- Lock all external doors, windows, and hatches to prevent them from swinging open while you’re away from your caravan.
- Secure loose items inside your caravan to prevent them from shifting or causing damage during strong winds.
- Attach a hitch lock to your caravan when it’s parked up, providing an extra deterrent against theft.
- Consider using a wheel clamp for additional security if you’ll be leaving your caravan unattended for long periods.
- Inspect straps and covers for any wear and tear, replacing them as necessary to keep external fittings secure.
Following these steps will help keep your caravan safe and secure, letting you relax and enjoy your time at the campsite with peace of mind.
4. Final Touches
Once your caravan is securely in place, it's time to give attention to the final touches. This involves arranging the interior for a comfortable stay and considering any external setup needs to make your camping experience complete.
Organising the Interior
Organising the interior of your caravan makes your camping experience more comfortable and efficient. It ensures that everything you need is within easy reach and helps prevent items from moving during travel.
- Start by making a list of essentials for your trip, including bedding, cooking utensils, food supplies, and personal items.
- Use storage boxes to keep similar items together. This keeps your caravan tidy and simplifies finding what you need.
- Install hooks on walls for hanging coats or wet towels. This saves space and keeps the interior organised.
- Place non-slip mats in cupboards and drawers. They prevent items from sliding around while you're driving.
- Dedicate a specific area for dirty laundry. A collapsible laundry basket can save space when not in use.
- Opt for collapsible kitchenware to maximise cupboard space. Items like kettles and bowls can take up less room this way.
- Label shelves and storage areas with their contents. Everyone can find things quickly without having to search every cupboard.
- Keep a small vacuum cleaner or broom handy for daily clean-ups, maintaining a neat living environment.
- Designate a safe spot for electronics and chargers, preferably near sockets, to avoid cables spreading across the caravan.
- Prepare an 'outdoor kit' with items like bug spray, sunscreen, and picnic blankets stored near the door for easy access when heading outside.
Following these steps will help create a well-organised caravan interior, contributing to a more relaxed and enjoyable camping trip.
External Set-Up Considerations
Setting up your caravan on a campsite implies more than just positioning and levelling. External set-up considerations are key to ensuring your camping experience is safe, comfortable, and pleasant. Ensure that all doors, windows, and roof lights are securely closed to prevent issues during transportation. Here are crucial external set-up considerations for your caravan:
- Review pitch boundaries to confirm your caravan fits without obstructing pathways or neighbouring pitches.
- Align the caravan with the allocated space’s orientation to make the most of natural light and shade.
- Employ levelling ramps under tyres to establish a steady and even foundation on varied pitches.
- Affirm the application of the handbrake once positioned to prevent the caravan from shifting.
- Deploy stabilisers to securely anchor your caravan against winds or accidental jostling.
- Establish utilities like electricity, water, and waste systems according to campsite facilities, ensuring cables and hoses don’t provoke tripping hazards.
- Set up the awning attentively, fastening it tightly to bear weather changes whilst providing extra living space.
- Position outdoor furniture within your pitch area to avoid trespassing on others’ territory and sustain campground harmony.
- Safeguard all external storage compartments and items that could be stirred by wind or inquisitive wildlife.
- Validate gas bottle connections if you intend to use an outdoor grill or heater, complying strictly with safety guidelines.
These steps ensure personal comfort and also positively impact the wider camping community by respecting communal areas and resources.
5. Preparing to Leave Your Caravan Pitch
Before leaving your caravan pitch, it’s essential to follow a few simple steps to ensure a safe and smooth departure:
- Disconnect the electrics: Disconnect the caravan’s electrical system from the tow vehicle’s electrical system. This prevents any electrical issues during transit.
- Release the breakaway cable: Release the breakaway cable from the tow vehicle’s tow ball. Ensure it’s stored securely to avoid damage.
- Raise the corner steadies: Raise the corner steadies to ensure the caravan is stable. This step is crucial to prevent any damage to the steadies during towing.
- Check the caravan’s systems: Check the caravan’s water system, hot water system, and gas supply to ensure they’re all functioning properly. Turn off any appliances and secure all connections.
- Final checks: Perform a final check to ensure everything is secure and in working order. This includes checking that all windows, doors, and hatches are closed and locked.
Following these steps will help you leave your caravan pitch safely and efficiently, ready for your next destination.
Final Checks and Safety Precautions
Before hitting the road, it’s essential to perform a few final checks to ensure a safe and enjoyable journey:
- Check the tow vehicle: Ensure the tow vehicle is in good working condition, with all necessary safety features functioning properly. This includes checking the brakes, lights, and tire pressure.
- Check the caravan: Ensure the caravan is securely attached to the tow vehicle and all systems are functioning properly. Double-check the hitch, breakaway cable, and electrical connections.
- Check the weather: Check the weather forecast to ensure you’re prepared for any conditions. This helps you plan your journey and avoid any adverse weather.
- Check the route: Check the route to ensure you’re aware of any road closures or restrictions. This helps you avoid any unexpected detours or delays.
- Emergency kit: Ensure you have an emergency kit on board, including a first aid kit, spare tire, and other essential items. This prepares you for any unforeseen circumstances during your journey.
By performing these final checks, you can ensure a safe and smooth journey, ready to enjoy your camping adventure.
Tips for a Smooth Setup and Departure
Here are a few tips to help you set up and depart your caravan pitch with ease:
- Use a caravan set up checklist: Create a checklist to ensure you don’t forget any essential steps. This helps you stay organized and ensures a smooth setup and departure.
- Practice makes perfect: Practice setting up and departing your caravan pitch to ensure you’re comfortable with the process. The more you practice, the more confident you’ll become.
- Take your time: Take your time when setting up and departing your caravan pitch to ensure everything is secure and in working order. Rushing can lead to mistakes and potential issues.
- Seek help if needed: Don’t be afraid to seek help if you’re unsure about any part of the process. Fellow campers or campsite staff are often willing to assist.
- Stay organized: Stay organized and keep all necessary equipment and documents in a safe and accessible place. This helps you find what you need quickly and easily.
By following these tips, you can ensure a smooth and stress-free setup and departure, making your camping experience more enjoyable.
Conclusion
Mastering the setup of your caravan on-site is crucial for a stress-free camping experience. This guide has walked you through every essential step, from choosing the perfect pitch to connecting utilities and ensuring safety with gas and electrical checks.
With these tips in hand, you're now well-equipped to make your next campsite stay both comfortable and secure. Enjoy creating unforgettable memories in the great outdoors with confidence in your caravan setup skills.
01708 959 100
sales@snappystartbatteries.co.uk
CONTACT
Unit B15, Suttons Business Park
New Road, Rainham, Essex,
RM13 8DE
New Road, Rainham, Essex,
RM13 8DE
© 2024 Snappy Batteries. All Rights Reserved.
No comments